
Hero Slardar, position 3 offlane
Patch 7.41
I read this as a normal ranked game, so economy, timings, deaths, and objective conversion all carry their usual weight. Your own medal was Guardian 1, so the targets below are tuned to your bracket and the next step toward Crusader.
The lane opened badly and stayed behind through the first half. Your team was 2.3k down at 10:00, then reached a 5.9k deficit at 24:00. The 25:47 and 27:15 fights gave you the largest recovery, with the team moving from 7.4k behind to a 1.3k lead at 29:00.
That lead lasted one wave. At 28:43, the team entered a 3v5 fight and lost three heroes without taking one. The enemy then took Roshan uncontested at 33:36, with an Aegis on Necrophos, and converted that state into bottom barracks. Your team recovered two fights and a mid barracks of its own, but the late exchanges happened with the enemy already holding the map and superior sustain. The final high-ground defense ended the game at 51:23.
The first positive thread came at roughly 18:00.
Your team picked off Jakiro, took the bottom tier-one tower, and narrowed the deficit. The next major thread went the other way at about 23:00 when the enemy took your mid tier-two and produced a 4.6k swing. That building loss opened the map while Axe's Blink Dagger was already online.
Your two cleanest recoveries were fights 5 and 6.
Juggernaut removed Necrophos first at 25:47, then again at 27:15, and your team converted the second fight into the mid tier-two. Those conversions were correct. The problem came immediately after: at 28:43, Ogre Magi opened while only three of your heroes were present against five. The team lost three and gave the lead back.
Five of seven won fights were converted, which is strong.
The damage came from fight selection and map control. Roshan was uncontested at 33:36 because no friendly observer covered the pit, then the Aegis-backed push took three bottom buildings. Later, the enemy took six high-ground buildings during the 43:29 attempt while your team was already 2.6k behind and one defender was dead.
Your role in these swings was mixed.
You fought in the recovery fights and helped the team regain the map. You also died in losing threads at 28:43, 31:02, 33:58, and 41:22. The specific personal thread to fix is the 41:22 over-commit. You had full enough resources and a playable 4v3, but your entry went too far ahead of the follow-up and removed your frontline from the fight before the enemy's response could be controlled.
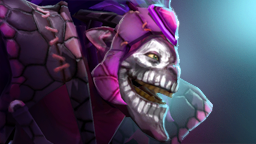
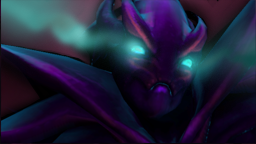
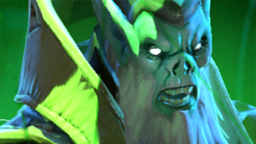
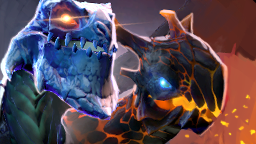
Your draft was built to fight through a physical frontline. Slardar and Ogre Magi create the first collision, Riki supplies silence and backline access, Dazzle extends the life of the core being focused, and Juggernaut converts the opening into kills. The clean combination was Corrosive Haze on Necrophos or Spectre, then Slithereen Crush, Fireblast, and Omnislash.
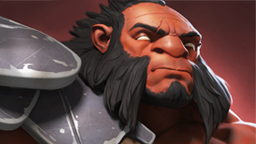
The enemy's structure had three major answers to your role. Axe and Jakiro could start fights before you reached your target. Necrophos punished extended physical contact through Death Pulse, Heartstopper Aura, Radiance, and Reaper's Scythe. Ancient Apparition made Dazzle's sustain unreliable with Ice Blast, while Spectre could join a split fight through Haunt.
Your offlane matchup was favored on paper against Spectre and Ancient Apparition, but the actual lane became hostile through pulls and the Necrophos rotation. The adaptation was to secure the lane's first safe levels, then leave with a real timing. You eventually did that with Blink Dagger, but the enemy's Axe reached his own initiation timing at 13:33 while you were still completing Vanguard and Power Treads.
The draft also contained global pressure from Spectre. Once she had level 6, a solo route was never truly isolated. Your team used no smoke, while the enemy used two and converted one. Your safe response was to move with an ally when farming beyond your own side and to treat missing enemy heroes as a possible Haunt arrival.
The decisive window was 25:47 to 29:00. Your team won the fights at 25:47 and 27:15, took the mid tier-two, captured the outpost, and moved from 7.4k behind to a 1.3k lead. The first fight had no reachable objective, but the second had an open mid-tower window and was converted correctly.
The next fight began at 28:43 with three of your heroes against five. Ogre Magi opened, Dazzle died immediately, and you died five seconds later. The alternative was to preserve the recovered lead, take the next wave, and wait for all five heroes before using Blink Dagger. That single fight gave the enemy the initiative back while Spectre and Necrophos were still scaling into the same midgame window.
 0:00
0:00 0:00
0:00 0:00
0:00 2:07
2:07 3:03
3:03 3:53
3:53 6:15
6:15 8:38
8:38 14:40
14:40 14:40
14:40 17:26
17:26 17:27
17:27 18:00
18:00 26:56
26:56 32:30
32:30 37:10
37:10 38:56
38:56 42:10
42:10 47:49
47:49 47:49
47:49 47:49
47:49 47:49
47:49 47:49
47:49 47:49Aghanim's Scepter47:49Boots of Travel17:20Heart of Tarrasque32:43Aghanim's Scepter44:53Manta Style30:39Butterfly48:56Blink Dagger13:33
Your offlane fundamentals split into three parts: reach the first timing, enter fights with the control ready, and remain present long enough for the carry to damage the target.
Farm and lane access The early lane produced 20 CS and 3 denies at 10:00. The lane was hostile, so your first job was not to force every last hit. It was to stay in XP range, spend regen before the next exchange, and use creep aggro when the wave sat at your Dire tower. The next-rank checkpoints are 30 CS, 5 denies, and level 6 by 10:00.
Initiation You applied 57 seconds of stun and the fight records credit you with starting the role's control chain. That part is real. The missing link was target persistence. Slardar's damage plan is not one Slithereen Crush and retreat. It is Corrosive Haze, Crush, repeated attacks, and Bash of the Deep on the same target.
Space creation The replay split enemy proximity pressure 45% toward you and 55% toward Juggernaut. That is close to even attention, so you did absorb a meaningful share. The team needed a stronger difference in the fights that mattered. When Juggernaut committed, your body needed to hold Necrophos or Axe in place and make the enemy choose between hitting you and losing their backline.
Resource and item timing Mana was never the bottleneck, and one Power Treads switch was enough to show the mechanic without making it a priority. The real resource issue was defensive timing. Your first Black King Bar components were available before the item was finished, so the next offlane habit is to convert gold into the commitment tool as soon as the threat requires it.
You are a short-range frontline core. Being ahead of the team in a fight is correct when you are landing the opener. Your average front position was about 1,263 units ahead of the team, and the replay explicitly calls that expected for your archetype. The fix is not to fight from the back.
The map pattern was more specific. You spent 64% of your alive time deep in your own territory, 21% on your own side, and only 10% on the enemy side or deeper. That describes a team defending under pressure, not a player constantly wandering into enemy territory.
The isolated death at 11:59 is the clean positioning leak. You were 11,436 units from help on your own side. The four enemy-side deaths were mostly fight context, and your team later won several fights where you were forward. Keep the forward stance for actual initiations, but require one visible ally to be close enough to damage the target before you continue past the first Slithereen Crush.
Six deaths occurred in dark areas while your supports held an observer charge. That is team vision context for a position 3. Your personal response is to treat those routes as hostile, move with the nearest ally, and call for coverage before farming there. Five other deaths came with actionable sight of the killer, including 15:44, 31:11, 34:02, 44:42, and 50:44. In those moments, the correction was the decision after seeing the threat.
Your team had a clear recovery window and used it well at 25:47 and 27:15. The break came at 28:43, when Ogre Magi opened with only three allied heroes present against five. That call gave the enemy the lead back. Your lever in that state was to hold Blink Dagger, keep your life, and wait for a full formation before the next initiation.
The team also left Roshan and Tormentor unscouted. At 33:36 and 49:38, no friendly observer covered the relevant area. Vision replacement and pit coverage belonged to your supports, while your role was to call for the objective information and avoid committing into the dark. Once Roshan was taken, the enemy had the Aegis and used it to take three bottom buildings. Your best response was a defensive hold around the next tower, not a blind contest in the pit.
The high-ground defenses were uneven. At 38:05, two defenders were dead when the enemy started an Aegis-backed push, so the team had no clean defensive state. At 43:29, one defender was dead and the enemy took six buildings. You were present for both defenses, which made your task clear: use Corrosive Haze on the first enemy entering tower range, then save Slithereen Crush for the hero whose movement lets the rest of the enemy team hit the building.
Juggernaut supplied 12.5k building damage and carried the team's primary structural pressure. Your 415 tower damage came during the midgame timing window, but the offlane contribution that mattered most was holding enemies away from Juggernaut while he attacked. At 46:04, your team pushed high ground while you were deep in your own territory. The team still took six buildings, but you were not present to make that push safer. When your carry begins a high-ground hit, use the map state to join the frontline unless the enemy has a clearly superior counter-engage already in position.